The Bow Buddy rock guard is not only sturdy, lightweight, compact, and designed to handle the toughest of road conditions, but it is also very easy to install. Simple yet effective design makes for a straightforward installation process.
The Bow Buddy rock guard uses a quick bolt-on system. Only 4 bolts are used to mount the extension tube holder to your trailer. No drilling is required. The extension tube slides in and is locked into place using the stainless steel pin provided.
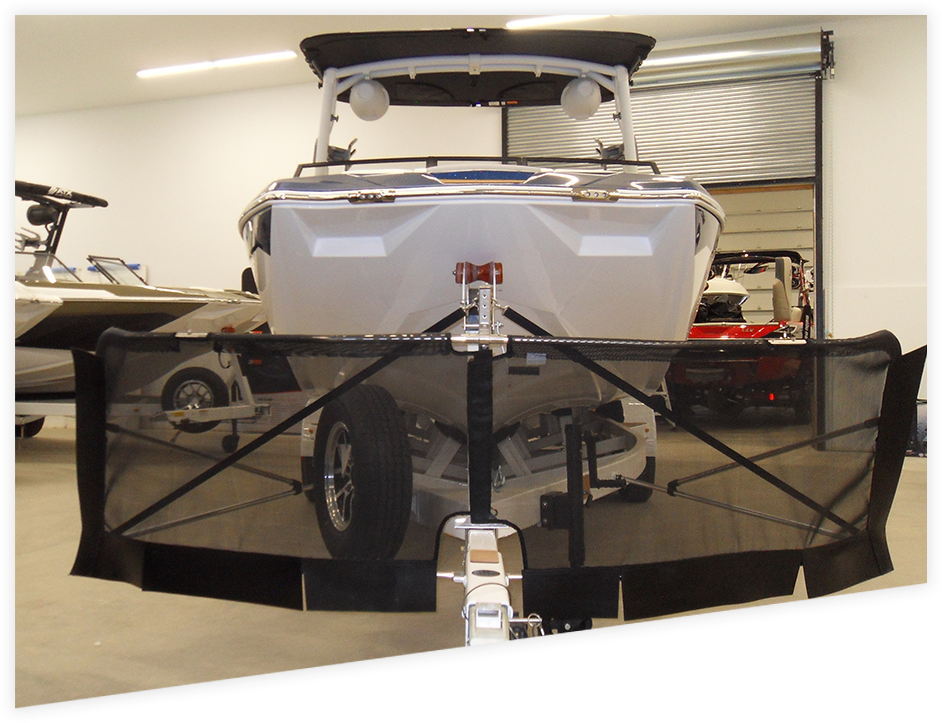
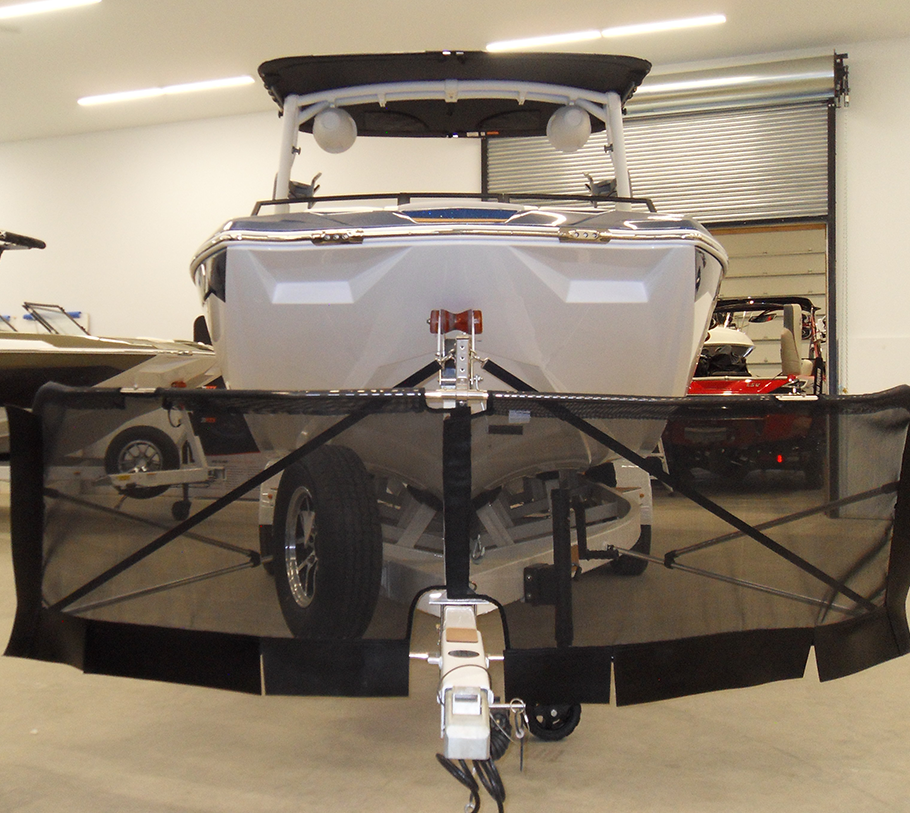
The tube frame holding the screen is made of stainless steel to ensure strength. This screen is designed in two sections. Each half of the screen slides into the tubes of the upper and lower stainless steel mounting brackets and is then locked into place with button locks.
The screens are easy to remove and store away. To remove for storage, or for access to the winch, simply press the button locks down and gently remove the screens from the mounting tubesl, then stow away safely. Once mounted, there is no need to remove the bottom bracket from your trailer.
Mounting Instructions
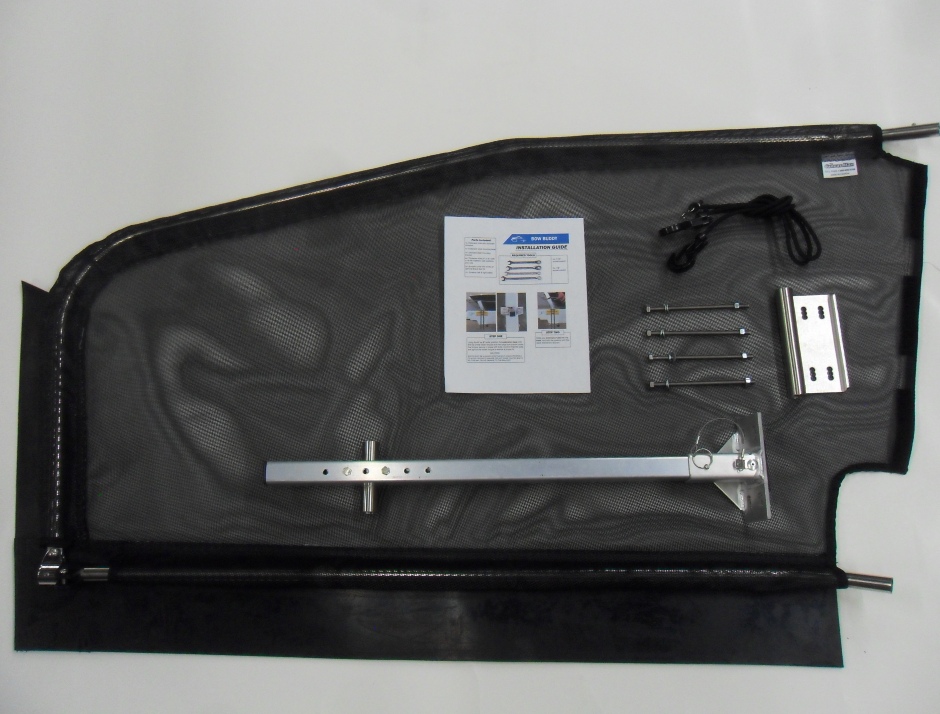
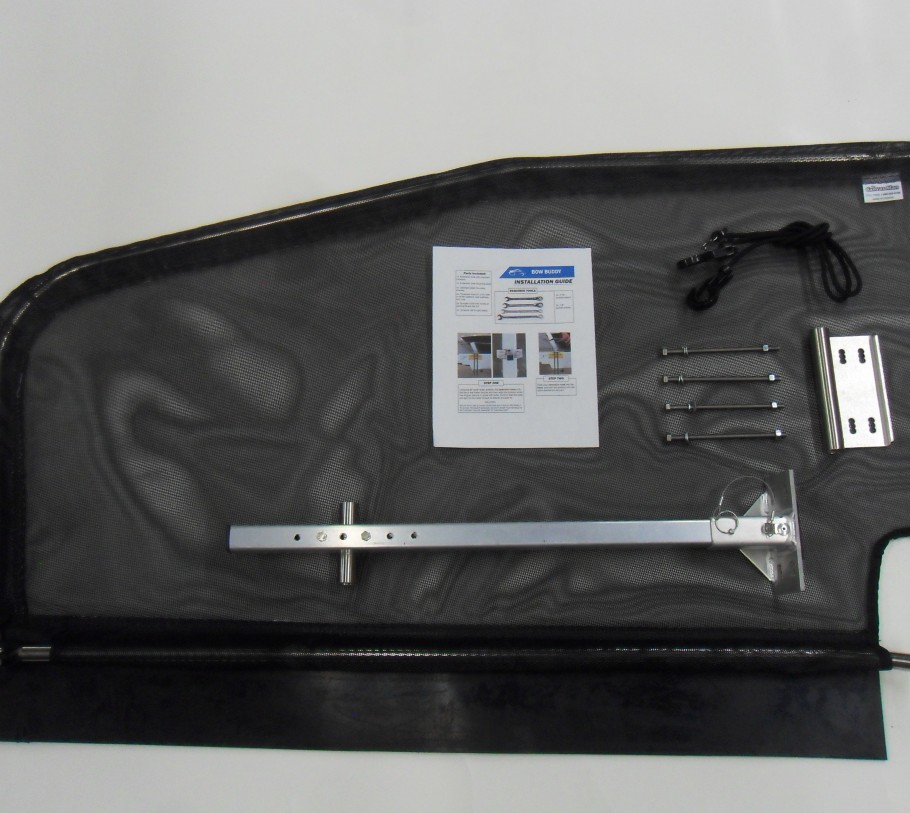
1 Extension Tube with mounted T-Bracket
1 Extension Tube Mounting Base
1 Stainless Steel Mounting Bracket
4 Threaded bolts with lock washer and nuts (6” or 8”)
2 Bungee Cords with hooks or Optional Brace Bar Kit
2 Screens (Left & Right Sides)
Two 7/16” socket wrenches
Two 1/2” socket wrenches
Using the 6” or 8” bolts, position the extension base onto the top of the trailer tongue and align the bracket under the tongue, secure in place with bolts. Make sure the bolts are tight to the trailer tongue to ensure proper fit. BOLTS MUST BE ALIGNED IN THE BOLT HOLES PROPERLY TO AVOID PRODUCT DAMAGE.DO NOT OVER TIGHTEN BOLTS AS THIS MAY CAUSE DAMAGE TO THE BRACKET.
Slide extension tube into the base and lock into place with the quick release pin lanyard.
The T-Bracket has been set to accommodate a 4” trailer hitch and may need to be adjusted to allow the screens to come together. If the screens do not come together, lower the T-Bracket on the extension tube.
Beginning with either left or right screen, carefully side the top bar into the T-Bracket until the pin locks into place. Allow the bottom part of the screen to drop down, then slide the bottom bar into the lower Stainless Steel Mounting Bracket until the pin locks into place. The left side screen has the Canvas Man Label.
Attach the bungee cord to the jaw slides as shown on each corner of the screen. Pull the bungee cord and wrap around a secure section of the trailer and attach it to itself.
Brace Bars Installation Guide
• 2 Deck Hinges
• 4 Bow Ends
• 4 Pop Rivets, #64 Stainless-Steel
• 4 8 x ½ Truss Screws
• 2 Quick Release Pins w/Lanyard
• 2 Brace Bars (7/8 aluminum tubing)
• 1 Pop Rivet Gun
• 1 Pipe Cutter
• 1 #30 9/64 Drill Bit
• 1 3/16 Drill Bit
• 1 Hand Drill
• Safety Glasses
1) Set a bow end in each end of the brace bars (do not secure yet). Fasten one end to each side of the bow buddy and holding the deck hinges in place put the other end of the brace bars to the desired position. Be sure the trailer jack is cleared. If necessary, you may cut the brace bars to the desired length.
2) Before you drill and place the screws in the brace bars, make sure bow ends are lined up properly. Drill through the brace bar and bow end (where the x is marked in the picture) with a #30 or 9/64 drill bit and place the truss screws to secure the bow end in place.
3) Place the deck hinges to the desired location by drilling the holes according to the deck hinge with a 3/16 drill bit. Be sure the deck hinges will line up with the bow ends that connect them. Before securing the deck hinge onto the trailer, connect one quick release tab to each deck hinge by placing the metal tab between the nylon deck hinge and the trailer beam. You can use either of the two drilled holes for this. And pop rivet into place. The pop rivet will secure the quick release pin tab and deck hinge to the trailer.


Mounting Instructions
For a video on how to install your Bow Buddy, please visit our YouTube Channel: https://www.youtube.com/watch?v=NZj89xF-pgg
What you need to know when ordering
How much room do you need on the tongue to mount a Buddy?
In short, the answer is 3.5”. As long as there is a space for the mounting kit somewhere between the winch and the hitch free of wires, jacks, brakes, etc., a Bow Buddy should fit just fine.
Check the trailer tongue depth. If the trailer tongue is deeper than 5” we have 8” bolts available. The Original and 90 units come standard with 6” bolts. The Max and Wrap units come standard with the 8” bolts. If the 8” bolts are needed, this must be specified when ordering.
The Bow Buddy is manufactured in British Columbia, Canada and is sold to international markets. CONTACT US by phone or email. All information given is kept confidential.
Dealer inquiries to market this hot new item are welcome.